In this post we will show you how you can easily create a simple popup registration form for your WishList Member membership site using the Elementor page builder.
We know many sites owners like to use a popup registration form as it is more visible than any other popup.
If you are using WishList Member and you offer a free membership, using a popup registration form will significantly increase your registration rates.
You can easily integrate WishList Member & Elementor Popup forms using our “Member Registration for WishList Member & Elementor” plugin
The Benefits of Popup Registration Form using Elementor Pro:
Using a popup registration form has many benefits, and using them with Elementor adds even more benefits, here are the main ones:
Easily define in what pages the popup will pop – You can decide to display the popup on your entire website / on archives / on posts / pages / categories and more.
The popup is very customizable – Elementor is one of the most popular page builders nowadays, and it is very customizable and easy to use. You can easily design any popup you want in minutes.
Creating Popup Registration Form using WishList Member & Elementor:
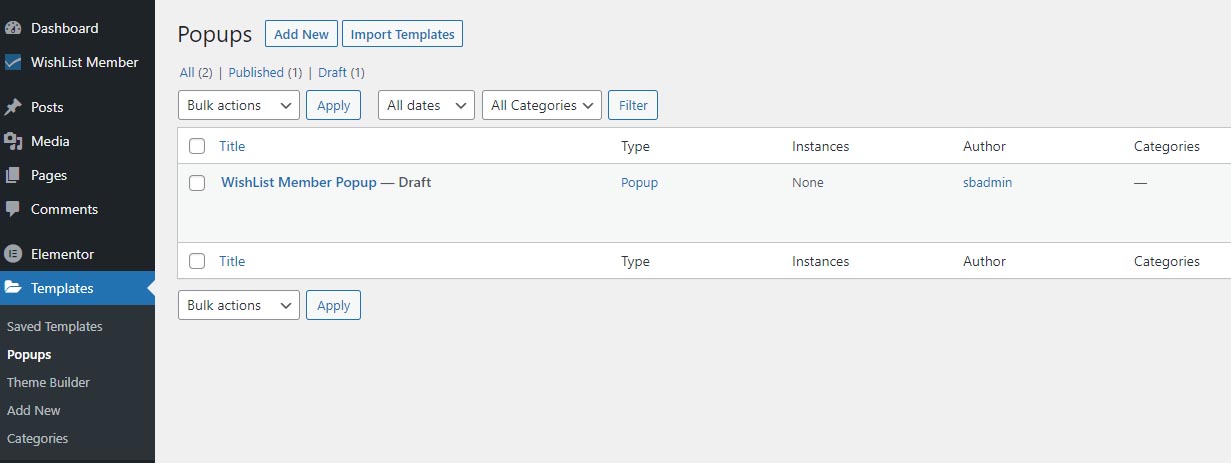
Step #1 – In order to create the registration Popup you simply need to go to the Elementor Templates menu > Popups and create a new popup:
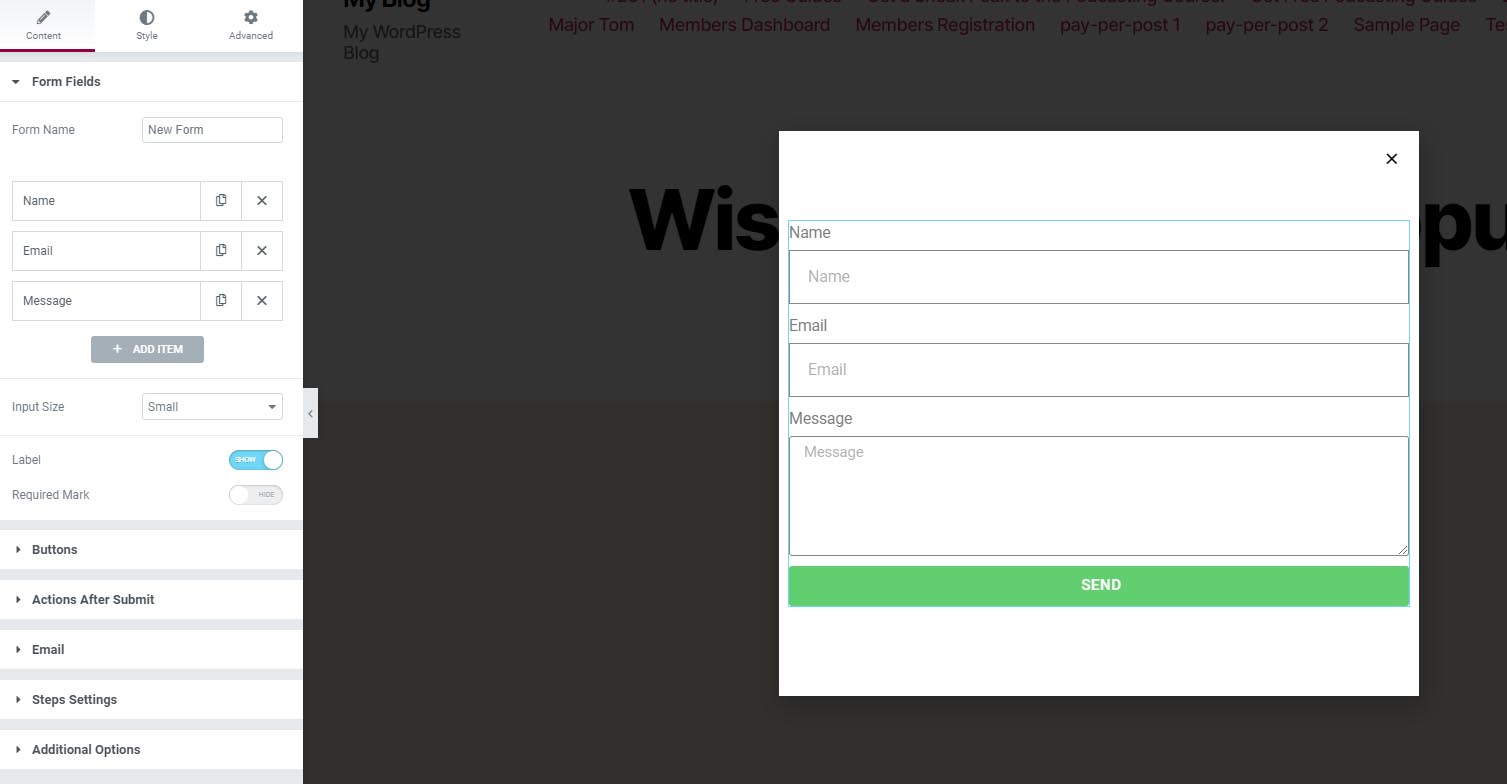
Step #2 – Add the Form widget to the Elementor page builder section and design it according to your needs:
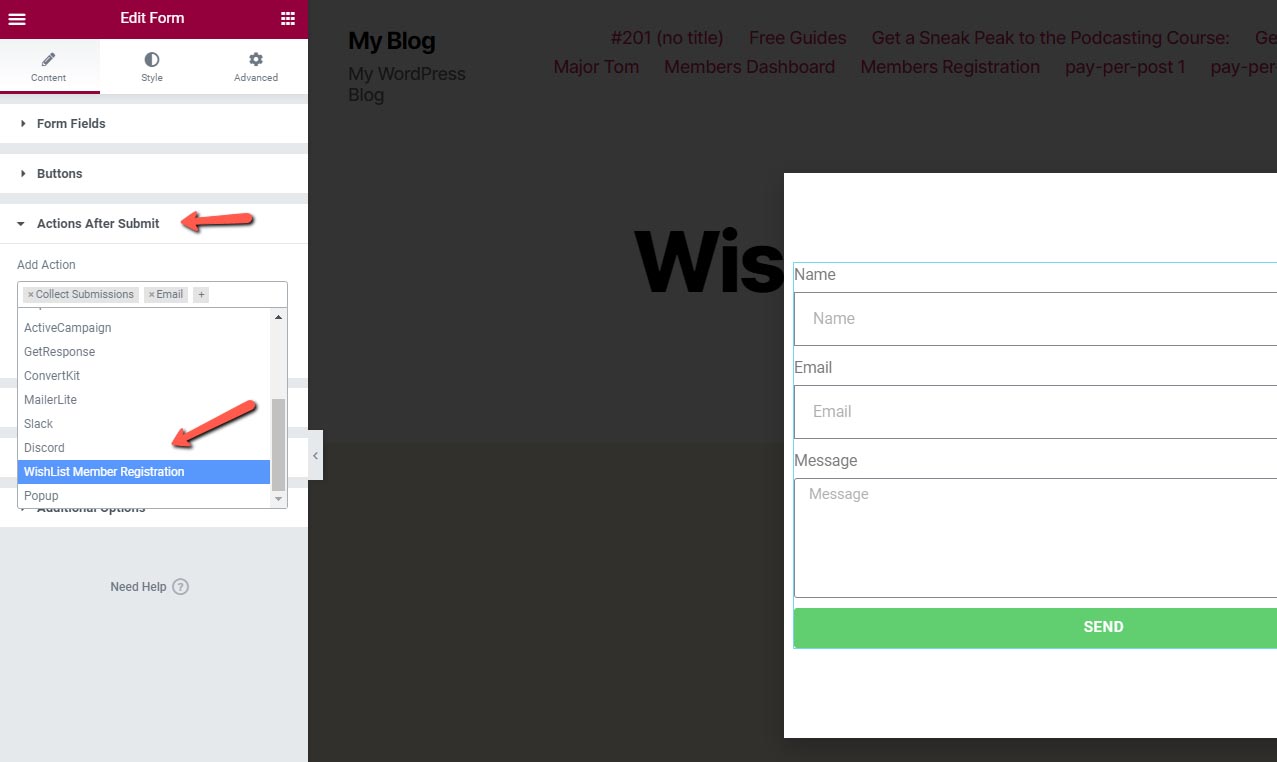
Step #3 – Go to the Actions After Submit tab and choose the “WishList Member Registration” option:
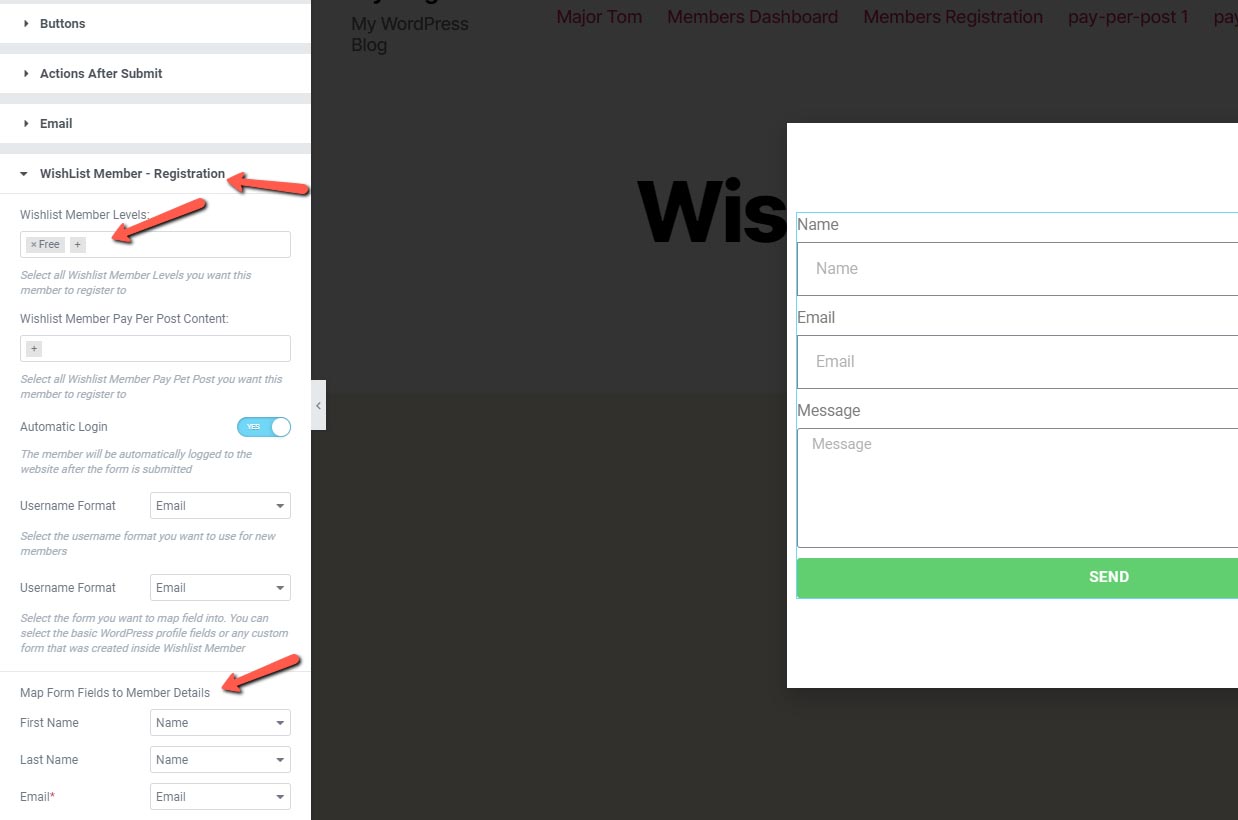
Step #4 – Go to the WishList Member – Registration settings and choose the relevant fields:
Step #5 – Click “Publish” and define where you want to display your popup:
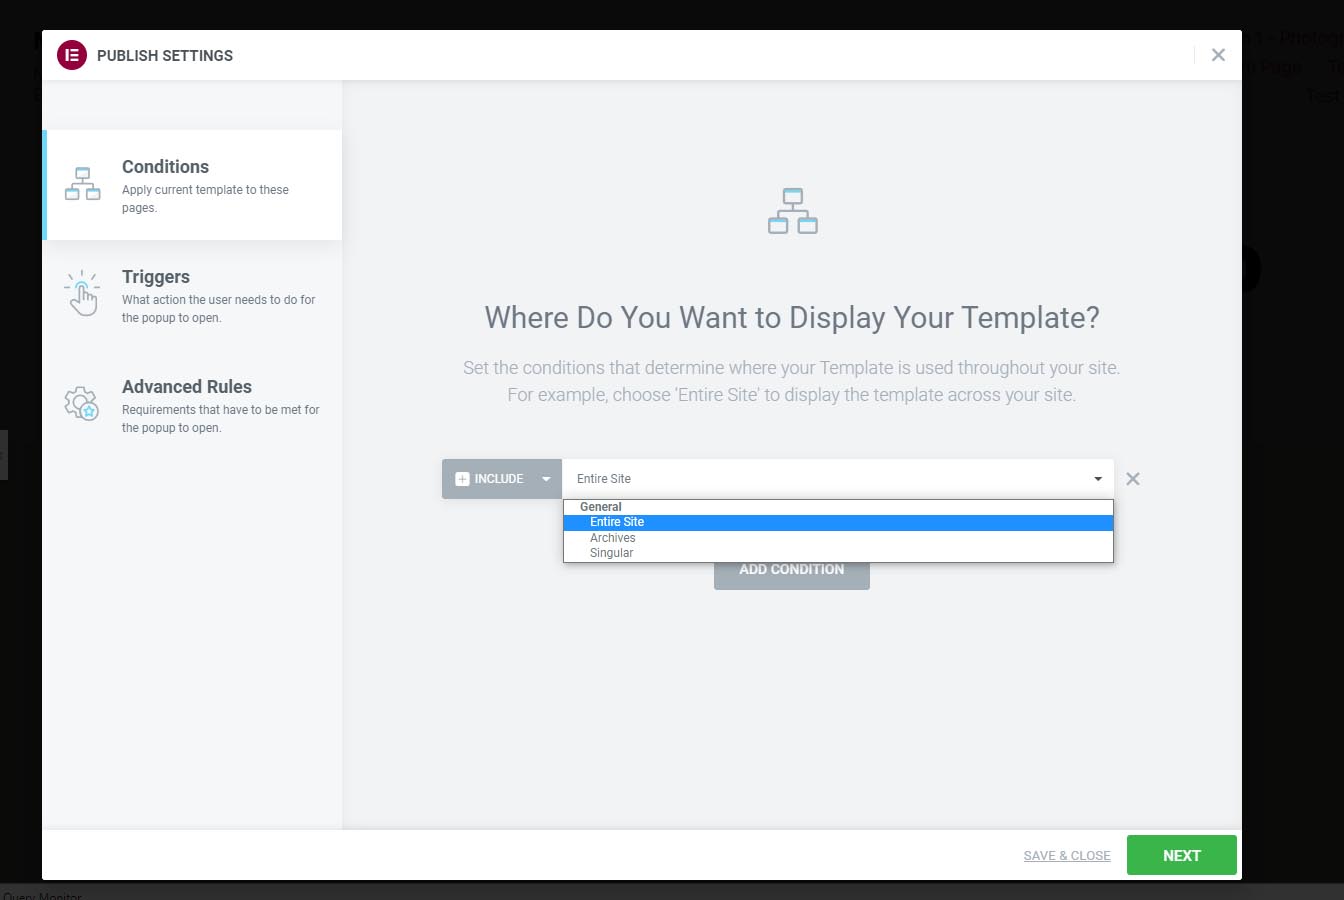
Define also the “Triggers” and the “Advanced Rules” and save.
Now every time a user will enter your website according to the conditions, triggers and rules you defined the popup registration form will be displayed and the subscribers will be registered to your email list and WishList Member membership (works with free memberships only).
Tips for Increasing the Registration Rates using Popup Registration Forms:
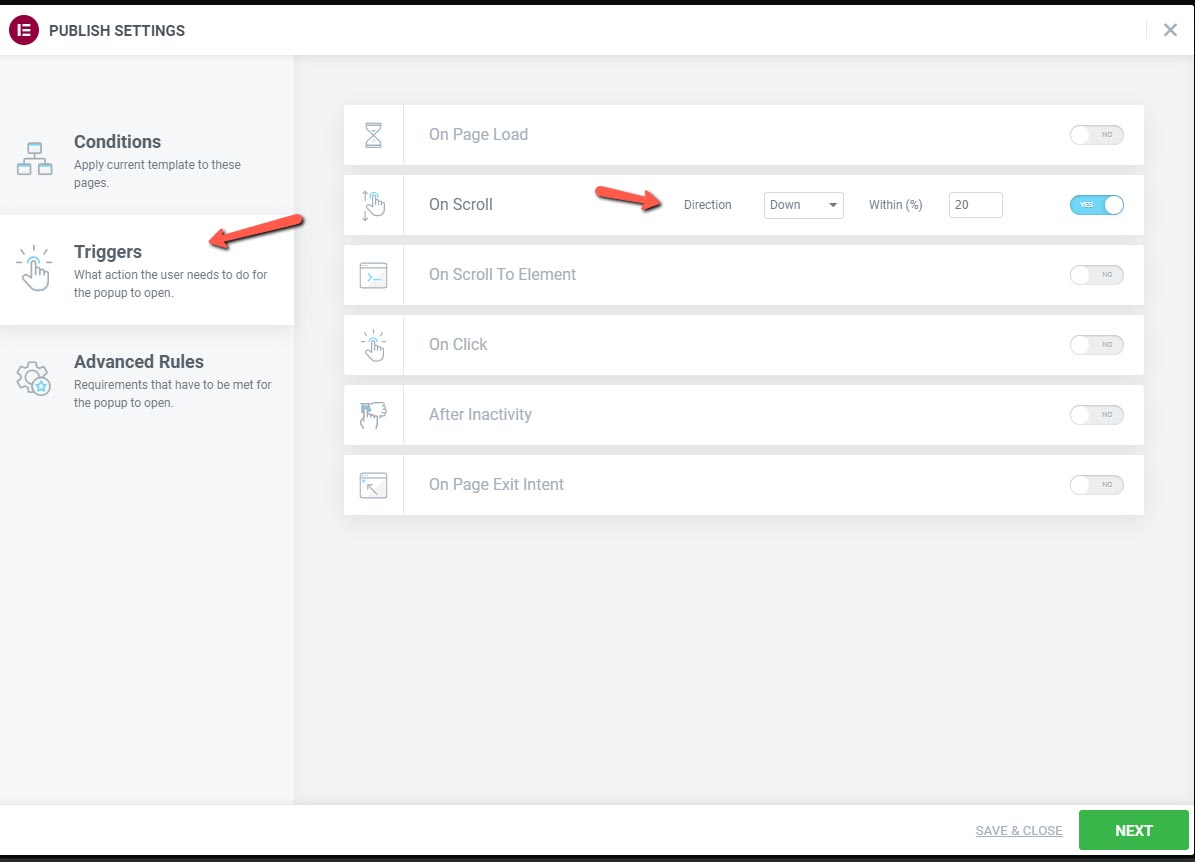
1. Trigger the registration form “On Scroll”:
Meaning that the popup will be displayed only after the visitor has engaged with your content, and not right after they enter the site.
You can easily define the “On Scroll” trigger inside Elementor:
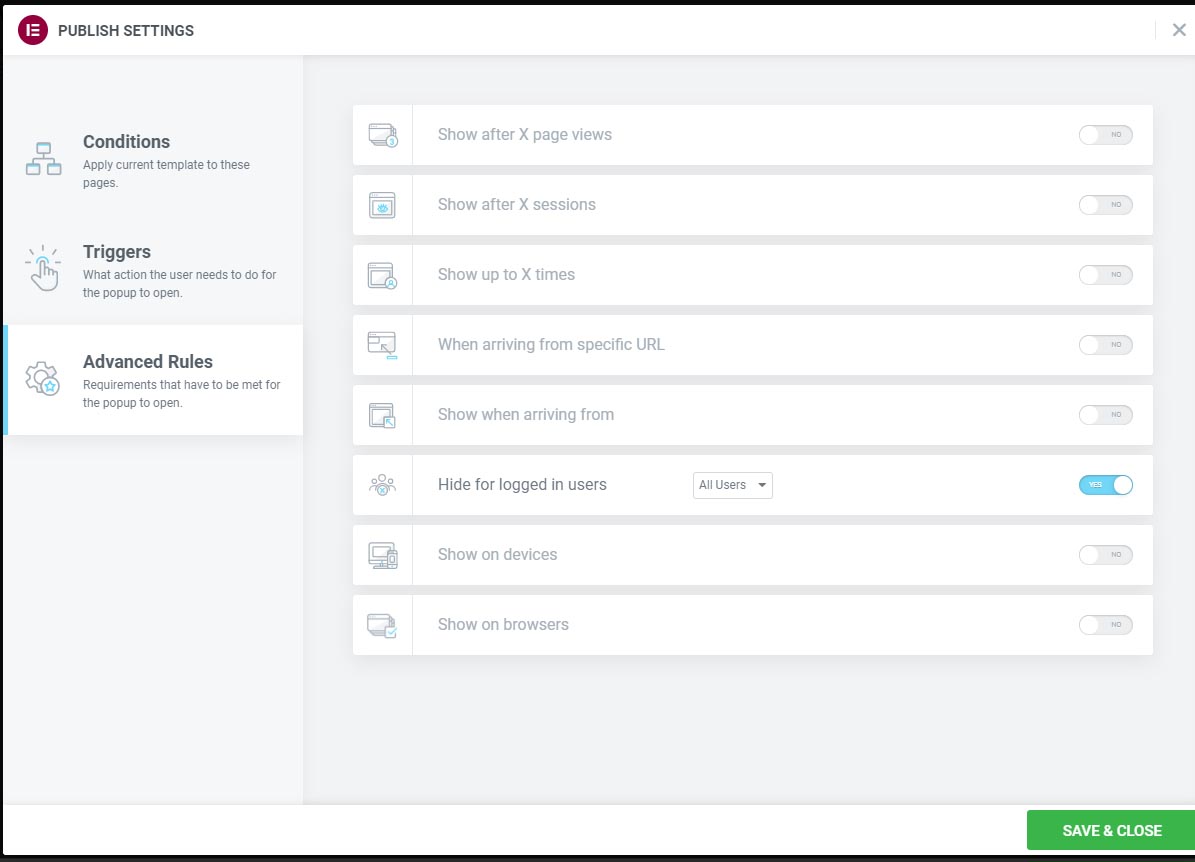
2. Display the popup only to non logged-in visitors:
You do not want to disturb your logged-in users (members/ customers etc.) with this popup, as it will only interrupt them from consuming your content.
Using Elementor you can easily define to display the popup only to non logged-in visitors:
You can easily integrate WishList Member & Elementor Popup forms using our “Member Registration for WishList Member & Elementor” plugin

Add your opinion to the discussion